How To Brine Olives at Home: Step-by-Step Guide
Olive Knowledge is a part of Amazon Associates. As an Amazon Associate, we earn from qualifying purchases. Read our Affiliate Disclosure to learn more.
Many people think that brining is a preserve for proteins and not fruits like olives, only because proteins are among the most significant culprits of food poisoning. However, if you are an avid olives consumer, you appreciate that brining olives prolongs their shelf-life.
Besides, olive brining is one way of eliminating oleuropein, the substance in freshly picked olives that gives the fruits a bitter taste.
As a farmer, brining ensures that none of your ready olives goes to waste just because you cannot sell them or turn them into olive oil fast enough. Today, I’ll show you how to brine olives at home.
Why The Need To Brine Olives
For starters, any food, fruits included, can go bad prematurely if it becomes contaminated during handling, and it is not always easy to tell if or not your olives have come into contact with germs.
Secondly, you may come across a good harvest of fresh olives and wish to take advantage of the low price that comes with bulk buying. Since fresh olives ordinarily retain their freshness for around two weeks when untreated, you would need to take some measures to preserve those fruits you think you will retain longer.
Fortunately, olives in brine can last an entire year or even a year and a half and still be as great as when you first got them.
Ingredients and Equipment You’ll Need
Considering that olives are normally picked in autumn, the season just before winter, if you want to have sufficient stock for the cold season and beyond, you need to be equipped with the paraphernalia necessary to treat your fresh fruits.
What you’ll need for olive brining:
- cooking pot,
- a bowl or jar,
- a glass jug,
- salt,
- vinegar,
- and clean water.
The fact that the equipment and ingredients needed to brine olives are readily available in the average household means that you can preserve olives conveniently and cost-effectively from any location.
Steps For Brining Olives at Home
In this section, you are going to learn the steps you need to take to brine your olive fruits from wherever you may be, whatever the season. Please note that all the steps are important, starting from choosing your fruits to brining them.
Selecting and Preparing Olives
If you are an olive farmer, you are already conversant with the best time to pick your olives, very likely from past experiences. However, it might be a challenge, especially if you only own a few olive trees, trying to ensure your olives do not go to waste once they are ready for harvesting.
While you may not have a big plant to produce olive oil, you do not always have to hasten selling your fruits and risk low prices. Having the skills to brine olives ensures you can preserve your fruits and sell them at a more appropriate time in the future.
When it comes to sourcing olives from the store, the challenge lies in there being several varieties in the market, available in different sizes and colors. Knowing the best olives to buy for brining ensures your fruits will still be palatable at the end of the brining process.
Owing to technology, you no longer have to contend with the only variety of olives available in your locality. Today, if you check on the internet, you’ll find olive farmers ready to deliver fresh fruit directly to your home or store within 24 hours! You can even order olives from Amazon. Just make sure to buy some table olives instead of oil olives.
How To Identify Healthy Olives
Considering that the sources of olive fruits are very few compared to the countries that consume them, you should not be surprised to find some not-so-healthy olives on store shelves when you go grocery shopping. After all, it sometimes takes several days to transport the fruits from the garden to the stores near you.
Even if you prefer to source your fruits from an open market, you need to know how to distinguish fresh olives from those that are either stale or manhandled.
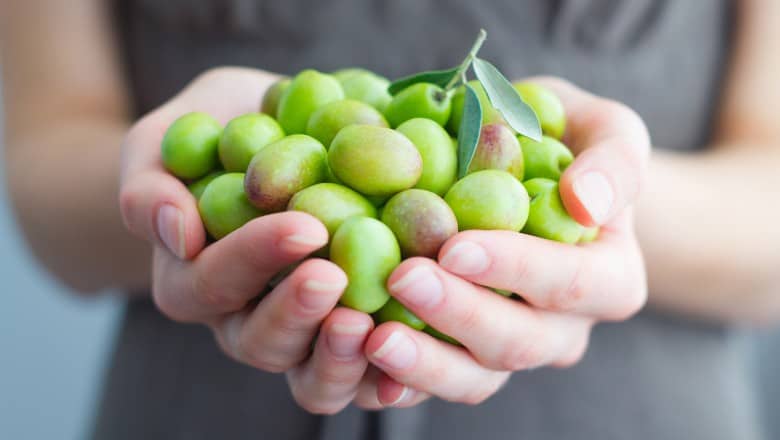
If the olives you are looking at are green, consider them mature but not yet ripe – and if they are healthy, they should be firm to the touch. While it is fine to pick olive fruits from the tree while still green, at this stage, the fruits are not so much palate-friendly. They are often bitterish, and sometimes they taste like grass. Some people prefer that taste, but if you don’t prefer bitterness, consider buying more ripened olives.
Olives change color as they ripen, so as you shop for olives to brine, you could find some that are red, purple, or even brown; sometimes, they are shades in between. Although olives also turn black from ripening, often, these vitamin-rich fruits turn black after being treated for storage.
Bright green olives:
- They are mature and freshest and with the longest shelf-life. They would be good for your kitchen stock, but if you are growing your own, you may prefer to leave them on the tree a little longer.
Yellowish-green olives:
- This is the color olives usually assume after bright green, and although they are mature and healthy, they are still not palatable. Nevertheless, this is the stage at which many farmers prefer to pick their fruits, as they are firm with minimal risk of mashing when handling.
Reddish-brown olives
- While these have their firmness intact, they are less bitter because they are close to being ripe. They are great for brining.
When the olives have a darkish-purple color or black:
- Olives with these colors are at the peak of ripeness and are delectable. You will love snacking on them or eating them in salads or sandwiches. Nevertheless, they have the shortest shelf-life, and you would have to preserve them by brining them or any other way for them to last a few more days.
Step 1: Soaking Olives In Water
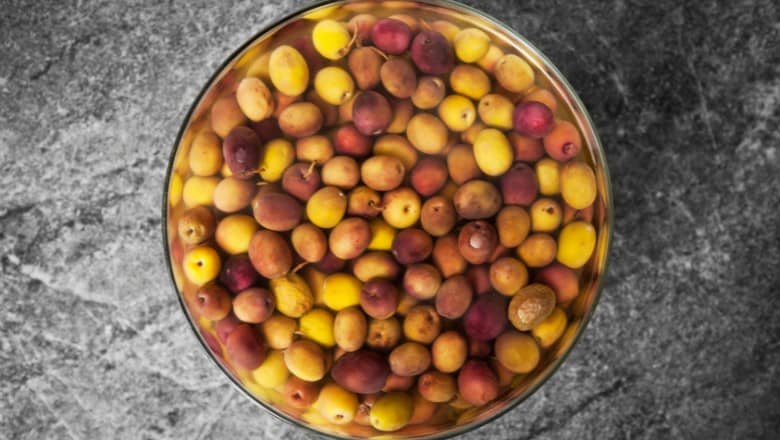
Soak the olives in water before the actual brining because doing so helps to minimize glucosides, oleuropein being among them.
This process involves putting your olives in a pail or any other such container and then pouring water over them until the fruits are fully immersed. Rainwater is ideal for this task as it has minimal or no minerals, but any other clean water is acceptable.
Cover the container and leave the soaked olive fruits to rest for two days; then drain out the water. Put in fresh water and leave the contents to rest for another two days, after which you drain out the water.
Repeat this process for two weeks, by which time most of the bitterness in your olives will have disappeared. It is worth noting that the two-week duration is only a recommendation, and you can choose to prolong the water-soaking period to even a month.
Step 2: Curing Olives in Brine

Essentially, when you say you want to brine olives, one understands that you want to cure them, the essence being that you are going to make your fruits less susceptible to rotting. Cured olives do not easily go rancid and can be stored and used for months with their goodness still intact.
The recommended ratio of salt, vinegar, and water is 2:5:20.
- Take a little of your water and pour it into the cooking pot
- Put the pot over the fire and let the water boil.
- Pour the salt into your bowl or jar, add in hot water, and stir until the salt is well dissolved.
- Add the vinegar and the rest of the water into the salt solution. Your liquid solution is now lukewarm.
- Put the olives in the glass jug and then pour in the salty liquid, ensuring the fruits are properly immersed. If need be, place something like a plate on top of the olives to ensure they are fully submerged in the liquid.
The brined olives will be ready to eat within two months or earlier, depending on how ripe the fruits were when you began the brining process. If they were already purple, any residual bitter taste would dissipate much faster than if the fruits were just yellowish-green.
Step 3: Storing Brined Olives
Now that you have learned how to brine olives, you need to know how to store them in a manner that preserves their flavor and the integrity of their nutrients. You have different options for such preservation, but before you embark on any storage process, you need first to drain out every drop of the liquid used to brine the olives.
This is important because by the end of the olive brining process, the liquid used is extremely bitter, and leaving any liquid undrained would only mess up the taste of your olives.
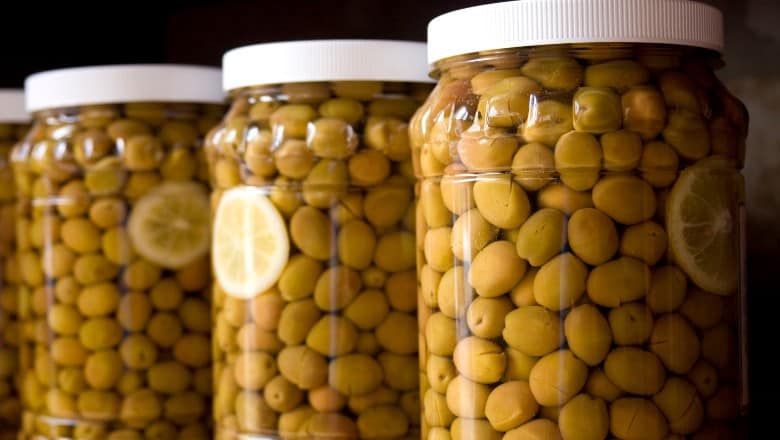
One of the popular methods of preserving olives is putting them in a vinegar solution, with the ratio of vinegar to water being half-half.
Another viable option is to store the brined olives in some freshly made brine. You may be pleased to know that whichever method you use to preserve your olives, you can still add spices to create your preferred flavor.
You may also wish to try out adding fresh lemon juice to your brined olives before storage, just to vary the common taste of olives.
If you need jars for storing olives, I recommend you check out the ones below:
How To Consume Brined Olives
Besides using brined olives in salads and sandwiches, you can also rinse them in plain water and eat them as they are. They make great snacks to nibble on, especially because they are low on calories.
Related: How To Incorporate Olives Into Everyday Diet
Also, because they have a pleasant flavor and are rich in vitamins, they make for great appetizers. Once you know how to brine olives, there is a whole lot you can do with the fruits, including serving them with pasta.
As for the olive brine itself, if it has been used with ripe olives and is, therefore, not too bitter, you can decide to spare it and add some to your Martini or other drink when you want to relax. Bloody Mary has been known to go well with a mix of olive brine.
Bottom Line
I hope that now you know the whole process of how to brine olives at home. It’s nothing hard, and even if you’re a complete beginner, you’ll be able to do it successfully.
All in all, brining olives is beneficial whether you use these anti-oxidant-rich fruits on a large or small scale. It will help you have a ready supply of vitamin E and others all through the year to keep you and your family healthy and glowing.